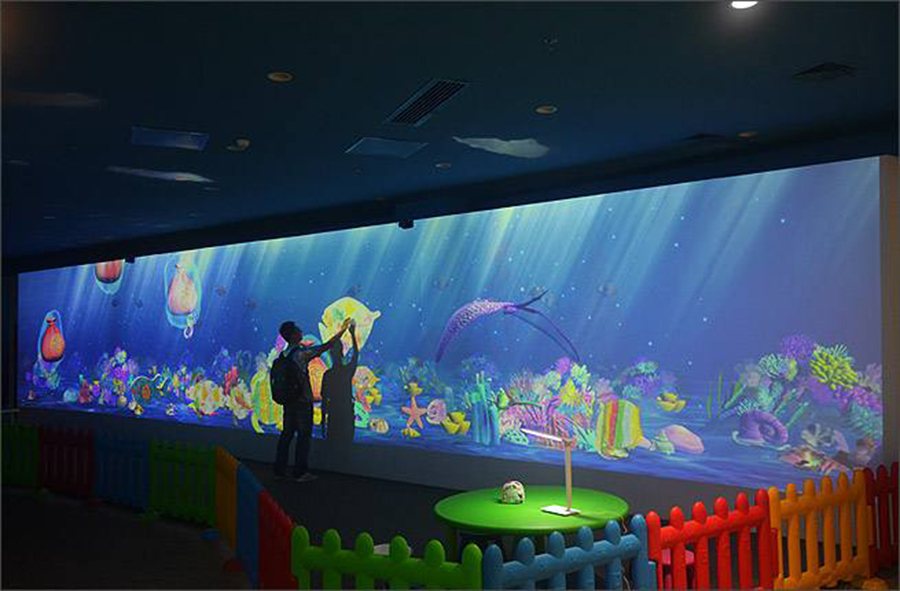
Three obstacles when turning a large screen into a touch screen
Camera-based systems miss touches when people block the view
LiDAR sweeps a laser along the wall to read touch positions. It covers a longer range than camera-based systems and still detects areas hidden behind people.
The wider the wall, the more touch hardware costs
You buy the sensor hardware yourself on the open market and purchase only the setup tool and SDK for 500,000 KRW. Choose a model to match your surface size, from 7m up to 50m in width and height.
Sensor integration takes development effort
The setup tool converts touches into Windows mouse events. Whether you use Unity or an ordinary program, you don't need to write sensor-specific code.
Mount the sensor, define the area, choose the delivery method
Mount the sensor at the top center of the screen and connect power and a USB or LAN cable to the PC. The rest is done step by step in the setup tool.
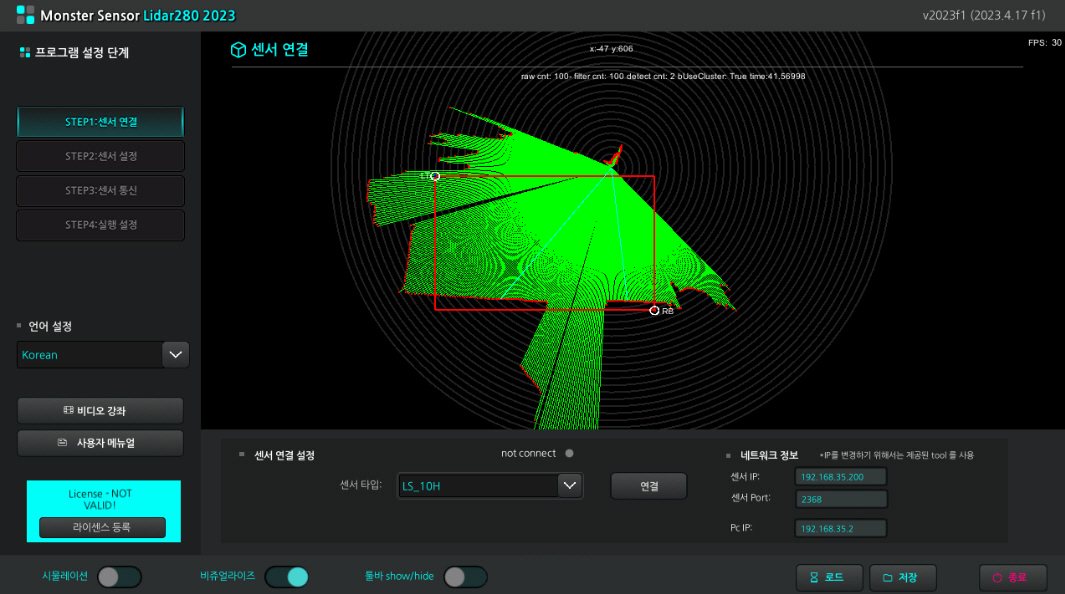
Sensor connection
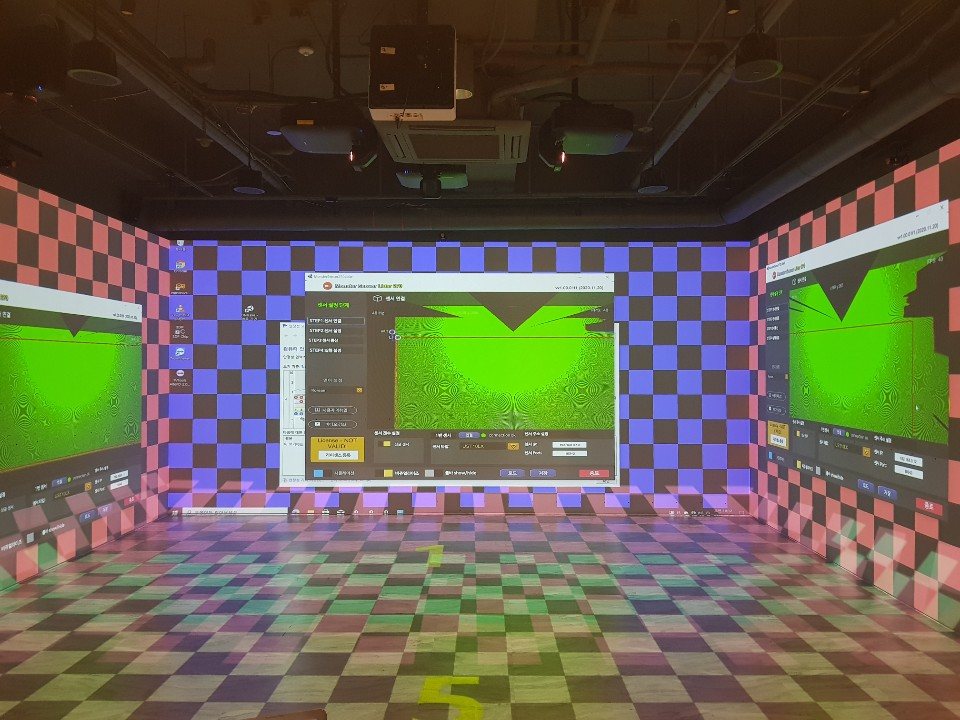
Select the sensor type and connect, and the space scanned by the sensor appears on screen.
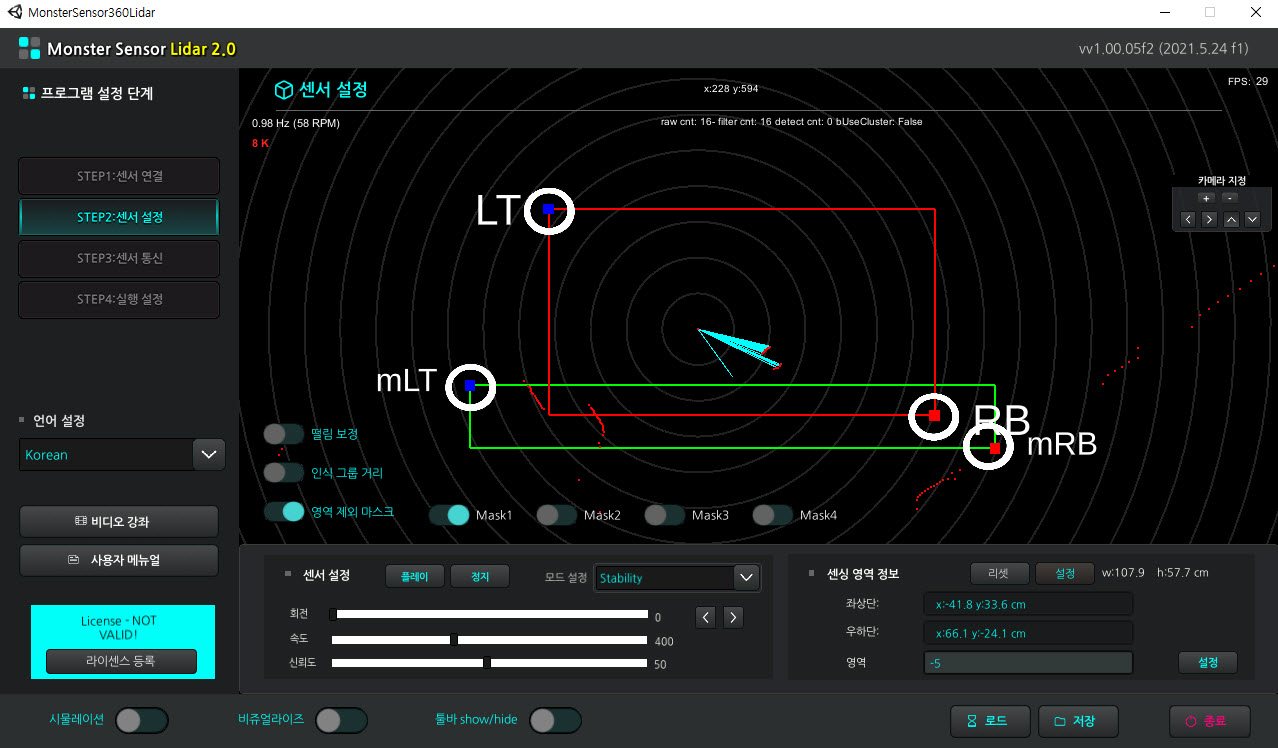
Sensor setup
Mark the corners of the screen to define the touch area, and mask any spots to exclude from detection.
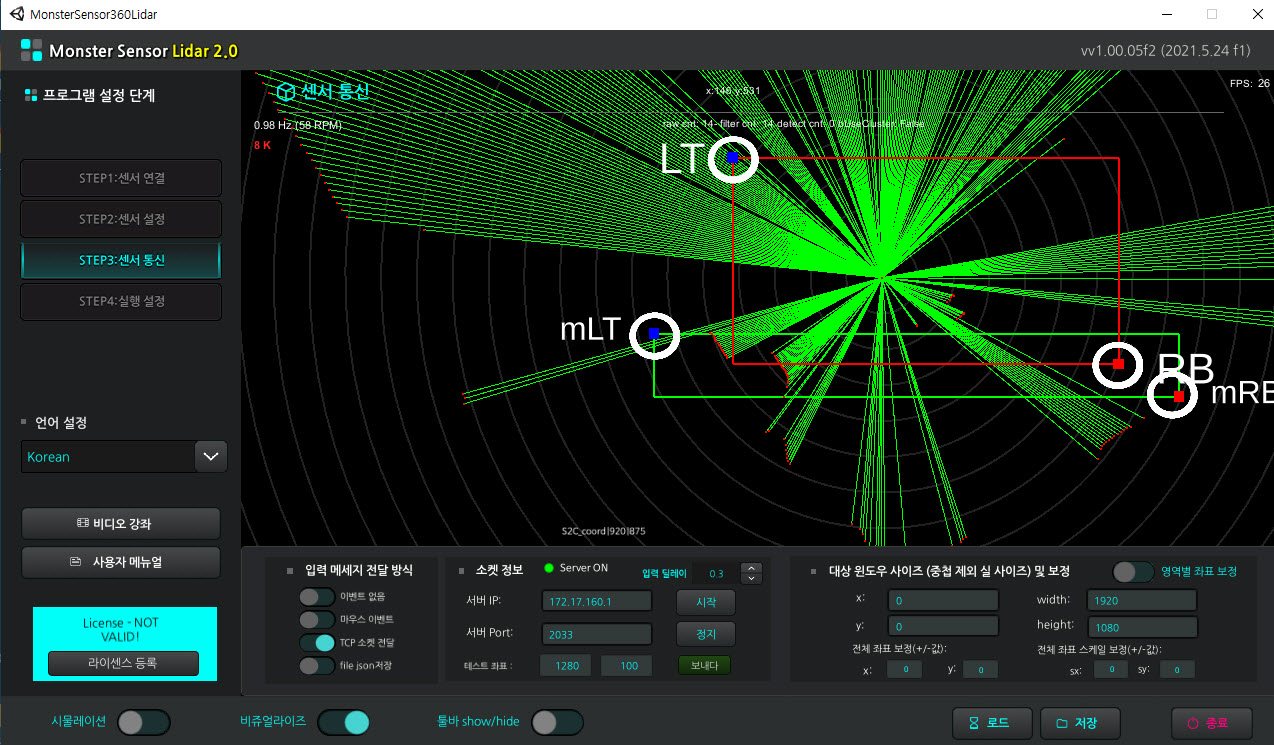
Sensor communication
Choose how detected touches are delivered: mouse events, a TCP socket or a JSON file.
For accurate coordinates, match the aspect ratio of the Windows display resolution to the projector's aspect ratio setting.
Choose by surface size and what touches it
The setup tool and SDK cost the same 500,000 KRW for every model. What differs is the sensor hardware's detection range, precision and connection type.
| Item | USB · Entry-levelLiDAR 360First wall-touch projects500,000 KRWSetup tool + SDKSensor sold separatelyView details |
LAN · Entry-levelPavo 280Wide walls and long cable runs500,000 KRWSetup tool + SDKSensor sold separately, approx. 600,000 KRWView details |
LAN · PrecisionHokuyo 270Down to small balls and fast objects500,000 KRWSetup tool + SDKSensor sold separately, approx. 1,600 USDView details |
LAN · High-speedPavo2 280Large indoor/outdoor spaces and sports500,000 KRWSetup tool + SDKSensor sold separately, approx. 1,000,000 KRWView details |
|---|---|---|---|---|
| Detection range Width · Height |
Standard 7~8m Advanced 14~15m |
10~30m | 10m | 10~50m |
| Detection precision | 5cm resolution | 0.25cm resolution | 0.25cm resolution | 0.25cm resolution, 100Hz high-speed detection |
| Multi-touch | No limit on touch points | No limit on touch points | No limit on touch points | No limit on touch points |
| Connection | USB Up to 30m. Extend beyond that with a repeater |
LAN No distance limit |
LAN | LAN No distance limit |
| Sensor hardware | RPLIDAR A2 · A3 YDLIDAR G2 · G4 |
Siminics Pavo | Hokuyo UST-10LX · 20LX | Siminics Pavo2 |
| Hardware purchase Reference price |
Buy directly from a reseller in Korea | Buy directly from overseas marketplaces Approx. 600,000 KRW (10m model) |
Overseas purchase Approx. 1,600 USD |
Buy directly from overseas marketplaces Approx. 1,000,000 KRW (50m model) |
| Images · Specs Connection · Manual |
View LiDAR 360 details | View Pavo 280 details | View Hokuyo 270 details | View Pavo2 280 details |
Prices include VAT (Korea) and are per-PC licenses. Sensor hardware prices vary by seller and time of purchase.
Floors, balls, body motion, visitor detection
When LiDAR isn't the right fit, use a depth camera or a presence sensor. The setup tool costs 500,000 KRW per type, incl. VAT (Korea), and you buy the sensor hardware yourself.
Depth floor detection sensor
A 3D depth camera detects touches on floors and walls, as well as balls.
- Range
- 3~4m width · height
- Precision
- 10cm
- Sensor
- Azure Kinect, RealSense, Orbbec Astra
Laser camera high-speed detection sensor
A laser emitter and camera detect fast-moving objects. Well suited to wall ball-shooting content.
- Range
- 4~5m, or 8~9m with 2 cameras
- Precision
- 1cm resolution
- Connection
- USB 2.0
Body-tracking sensor · Spatial mapping sensor
Detects the human skeleton and the surrounding space for motion content such as climbing games and virtual try-on.
- Range
- 3.5m; 8m for the camera body-tracking sensor
- Integration
- Skeleton data provided via SDK. Integration method agreed before purchase
Presence sensor
Plays video when someone enters and stops when they leave. Start delay, play time and standby time are set as a scenario.
- Infrared
- PIR, USB connection, up to 50m
- Camera
- Depth-based space detection, human skeleton detection. Up to 8m
Three ways to receive touches
Connect existing content right away with mouse events, or if you develop your own, receive coordinates over a socket and use them freely.
- Mouse events
- Turns touches into Windows mouse input. Content that responds to mouse clicks works without modification.
- TCP socket
- Connect to the setup tool over a socket and coordinates arrive as text. You can handle multiple coordinates freely, so we recommend it for custom development.
- JSON file
- Saves coordinate data to a JSON file for other programs to read.
- Unity SDK
- Comes with an SDK for Unity and a socket integration example. The manual appendix explains how to build multi-touch content.
- Using multiple sensors at once
- Use 1 sensor and 1 setup tool per surface. For 3 surfaces, mount 3 sensors, each at the top center of its surface.

When your sensor arrives, try it out with the demo first
Request the setup tool demo by email and we will send it to you. After purchase, just enter a license key into the demo you were using.
Tell us which sensor model you plan to use and we will email you a demo link for the matching setup tool.
Request a demoCovers everything from sensor installation and the 4-step setup to using multiple sensors and building multi-touch content.
Follow along on video from sensor connection to touch area calibration.
Watch on YouTube-
1Prepare the sensor hardware
Choose a model that fits your surface size and buy it from a reseller or an overseas marketplace. Contact us for help choosing a model.
-
2Test with the demo
Install the demo you received by email and check on site that touches are detected reliably.
-
3Send the hardware key
Find your hardware key via the license registration button in the program and email it to us.
-
4Enter the license key
Paste in the key you receive and activate it, and you are done.
Real questions from our inquiry board
Every installation site is different. If something isn't covered here, look in the Tech notes or contact us.
View Tech notesCan it work with content I've already built?
Every sensor solution provides mouse events. Any content that responds to mouse clicks will work. You can also receive coordinates over a socket or a JSON file at the same time.
Is installation and calibration difficult?
Mount the sensor above the screen, power it on and run a LAN or USB cable to the PC. Calibration is simple enough for operating staff to do while watching the tutorial video.
How do I make all three walls touch surfaces?
Use 1 sensor and 1 setup tool per surface. Mount each sensor at the exact top center of its surface. The method is the same when the screens are combined into one wide monitor.
Touch positions drift toward the edges
Coordinates can shift inward or outward the farther they are from the sensor. Increase or decrease the overall scale correction values (default 1, 1) in the setup tool to compensate. To detect all the way to the edge of the area, change the sensing area value from the default -10 to 0.
What happens to my license if I change PCs?
Licenses are issued per PC. If a PC fails and has to be replaced, we transfer the license to the new PC one time only.
Tell us your surface size and what will touch it
We will recommend the right sensor model and configuration and provide a quote. +82-70-8650-6368 · msw2005@naver.com